Microsoft Teams
This page contains the setup guide and reference information for Microsoft Teams.
Features
| Feature | Supported? |
|---|---|
| Full Refresh Sync | Yes |
| Incremental Sync | No |
| SSL connection | Yes |
| Namespaces | No |
Prerequisites
- An Azure account that has an active subscription
- Application (client) ID
- Directory (tenant) ID
- Client secrets
The Microsoft Graph API uses OAuth for authentication. Microsoft Graph exposes granular permissions that control the access that apps have to resources, like users, groups, and mail. When a user signs in to your app they, or, in some cases, an administrator, are given a chance to consent to these permissions. If the user consents, your app is given access to the resources and APIs that it has requested. For apps that don't take a signed-in user, permissions can be pre-consented to by an administrator when the app is installed.
Microsoft Graph has two types of permissions:
Delegated permissions are used by apps that have a signed-in user present. For these apps, either the user or an administrator consents to the permissions that the app requests, and the app can act as the signed-in user when making calls to Microsoft Graph. Some delegated permissions can be consented by non-administrative users, but some higher-privileged permissions require administrator consent.
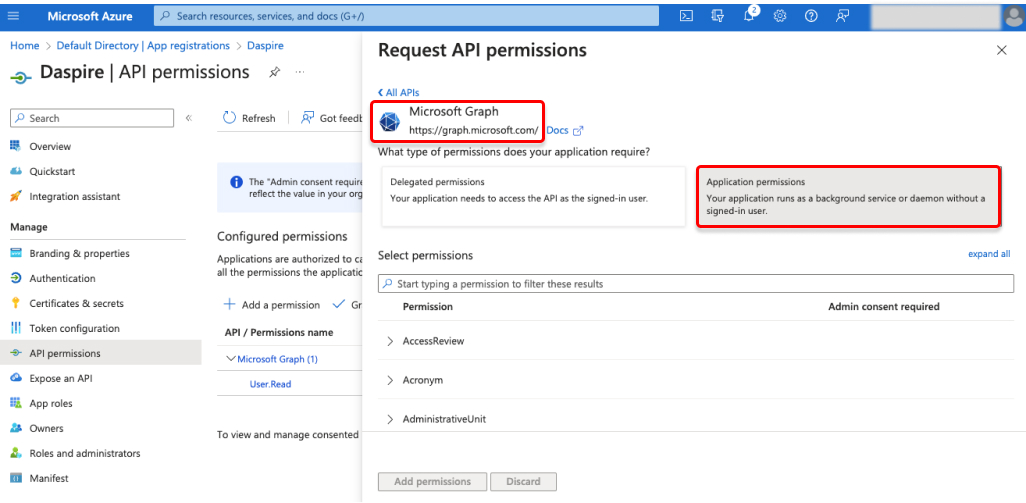
Application permissions are used by apps that run without a signed-in user present; for example, apps that run as background services or daemons. Application permissions can only be consented by an administrator. This source requires Application permissions.
Setup guide
Step 1: Obtain Microsoft Teams crendentials
Follow these instructions or the below steps for creating an app in the Azure portal. This process will produce the client_id, client_secret, and tenant_id needed to set up the source in Daspire.
Login to Azure Portal.
Select Microsoft Entra ID from list Azure services, or search for it in the search bar.

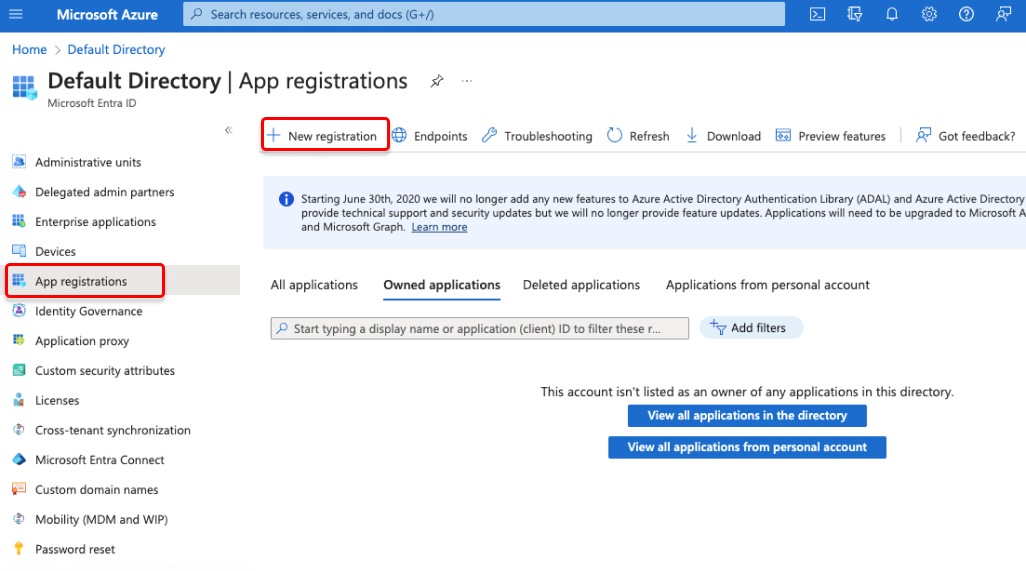
On the left side nav bar, click App registrations, and click click the New registration tab.
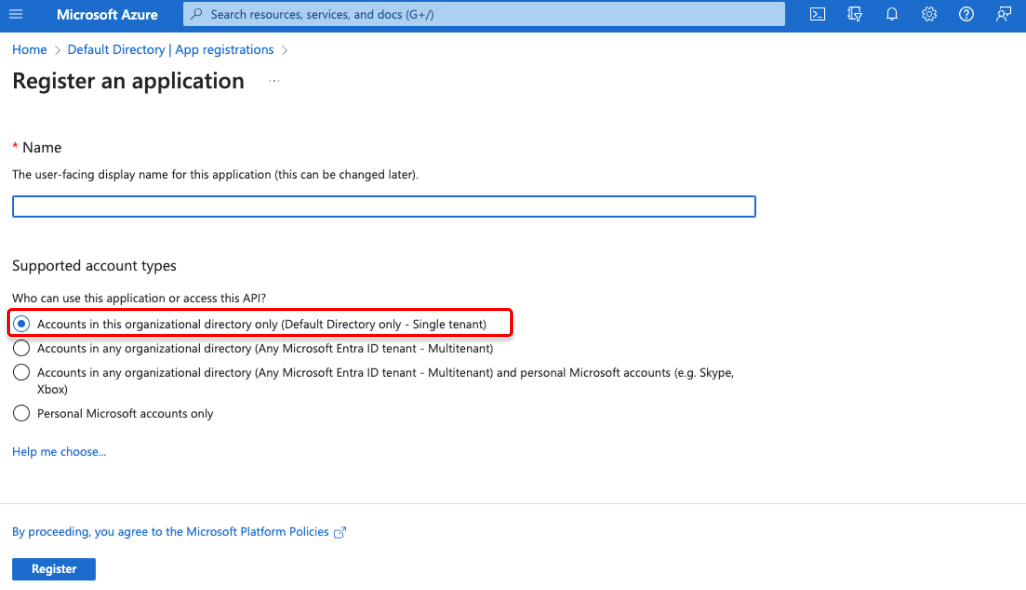
Register an application. Enter a name for your app, and in Supported account types, select Accounts in this organizational directory only. Cick the Register button.
You will be directed to your App's Overview page. From there, copy the Application (client) ID and Directory (tenant) ID. You will use them later for authentication in Daspire.
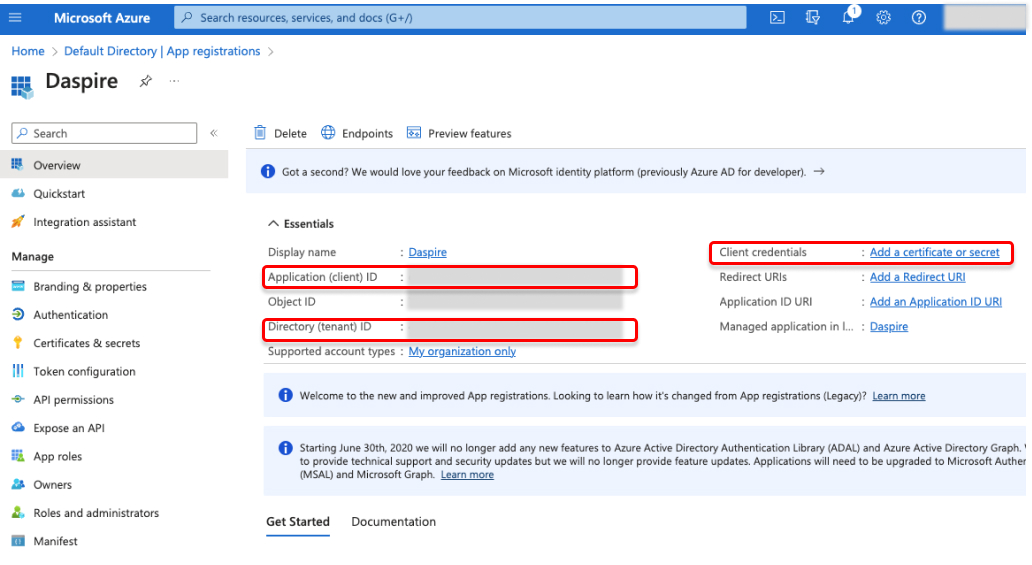
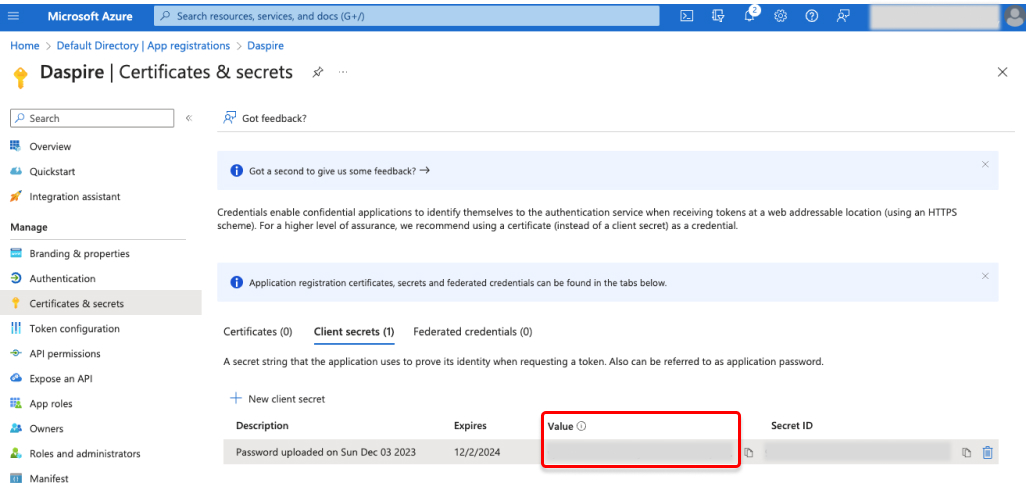
Click Add a certificate or secret, which will open the Certificates & secrets page.
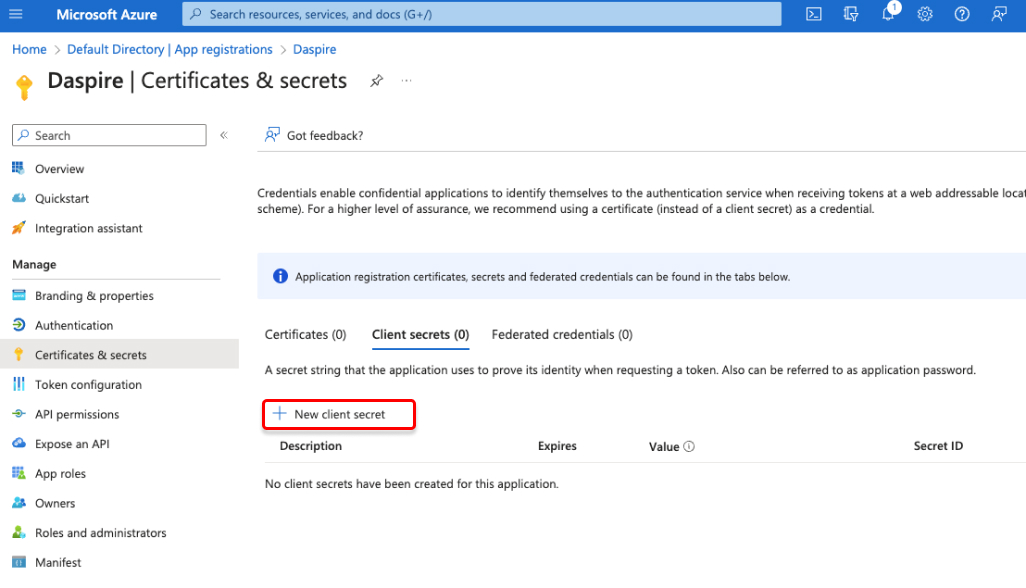
Click + New client secret. In the opened pop up, provide a description for the client secret and select the expirary duration that suits your need. Then click Add.
Copy the client secret Value. You will use it later for authentication in Daspire.
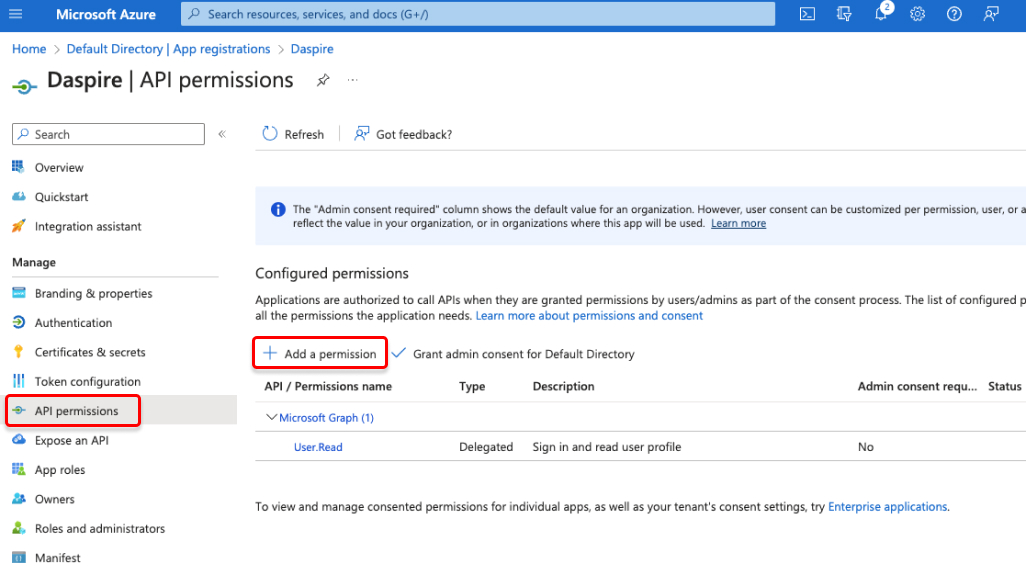
On the left side nav bar, click API permissions, then Add a permission.
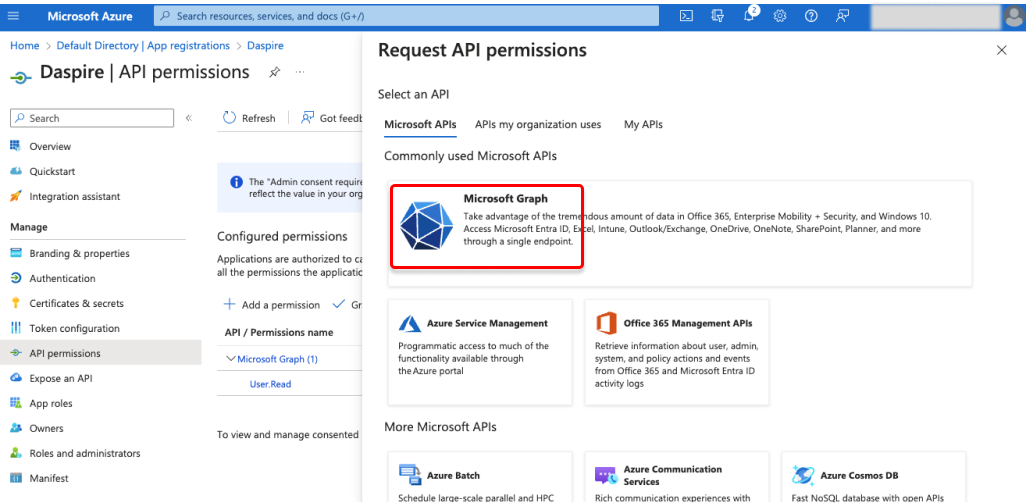
Select Microsoft Graph, then select Application permissions.
Select the following permissions:
Channels
- Channel.ReadBasic.All
ChannelMembers
- ChannelMember.Read.All
- ChannelMember.ReadWrite.All
ChannelMessage
- ChannelMessage.Read.All
Chat
- Chat.Read.All
- Chat.ReadBasic.All
- Chat.ReadWrite.All
ChatMember
- ChatMember.Read.All
- ChatMember.ReadWrite.All
ChatMessage
- ChatMessage.Read.All
Files
- Files.Read.All
- Files.ReadWrite.All
Groups
- Group.Read.All
- Group.ReadWrite.All
GroupMembers
- GroupMember.Read.All
- GroupMember.ReadWrite.All
TeamsActivity
- TeamsActivity.Read.All
TeamMember
- TeamMember.Read.All
- TeamMember.ReadWrite.All
TeamTabs
- TeamsTab.Read.All
- TeamsTab.ReadWrite.All
- TeamsTab.ReadWriteForTeam.All
Team
- Team.ReadBasic.All
TeamworkDevice
- TeamworkDevice.Read.All
- TeamworkDevice.ReadWrite.All
Users
- User.Read.All
- User.ReadWrite.All
- Once you're done, click Add permissions.
Step 2: Set up Microsoft Teams in Daspire
Select Microsoft Teams from the Source list.
Enter a Source Name.
Enter Application (client) ID, Directory (tenant) ID, and Client secrets you obtained in Step 1.
Click Save & Test.
Supported streams
This source is capable of syncing the following streams:
- channels
- channel_members
- channel_tabs
- conversations
- conversation_threads
- conversation_posts
- groups
- group_members
- group_owners
- team_drives
- team_device_usage_report
- users
Data type mapping
| Integration Type | Daspire Type |
|---|---|
string | string |
number | number |
array | array |
object | object |
Troubleshooting
Rate limit: This integration is restricted by normal Microsoft Graph requests limitation.
Max number of tables that can be synced at a time is 6,000. We advise you to adjust your settings if it fails to fetch schema due to max number of tables reached.