Notion
This page contains the setup guide and reference information for Notion.
Features
| Feature | Supported? |
|---|---|
| Full Refresh - Overwrite | Yes |
| Full Refresh - Append | Yes |
| Incremental - Append | Yes |
| Incremental - Append + Deduped | Yes |
Note: Users stream only supports full refresh sync mode.
Prerequisites
- Access to a Notion workspace
- Client ID (when using Access Token to authenticate)
- Client Secret (when using Access Token to authenticate)
- Access Token
Setup guide
Step 1: Create an integration in Notion
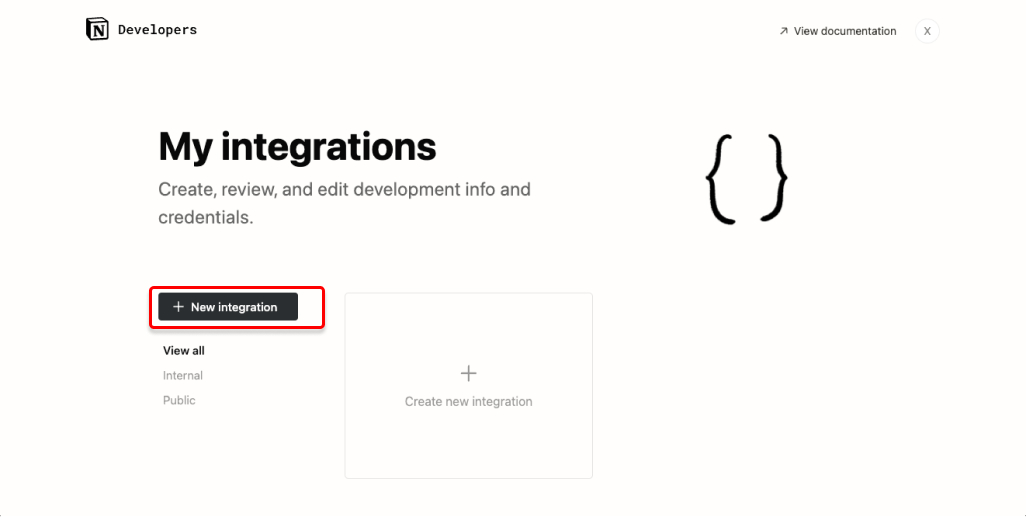
Log in to your Notion workspace and navigate to the My integrations page.
Click + New integration.
NOTE: You must be the owner of the Notion workspace to create a new integration.

Enter a Name for your integration. Make sure you have selected the correct workspace from the Associated workspace dropdown menu, and click Submit.
Inside the integration you just created, click Capabilities from the left sidebar. Check the following capabilities based on your use case:
- Read content: required for all connections.
- Read comments: required if you wish to sync the Comments stream
- Read user information (either with or without emails): required if you wish to sync the Users stream
Step 2: Make your integration public and obtain credentials
Using OAuth 2.0
Inside the integration you just created, click Distribution from the left sidebar, and toggle the switch to make the integration public.

Fill out the required fields in the Organization information and OAuth Domain & URIs section.
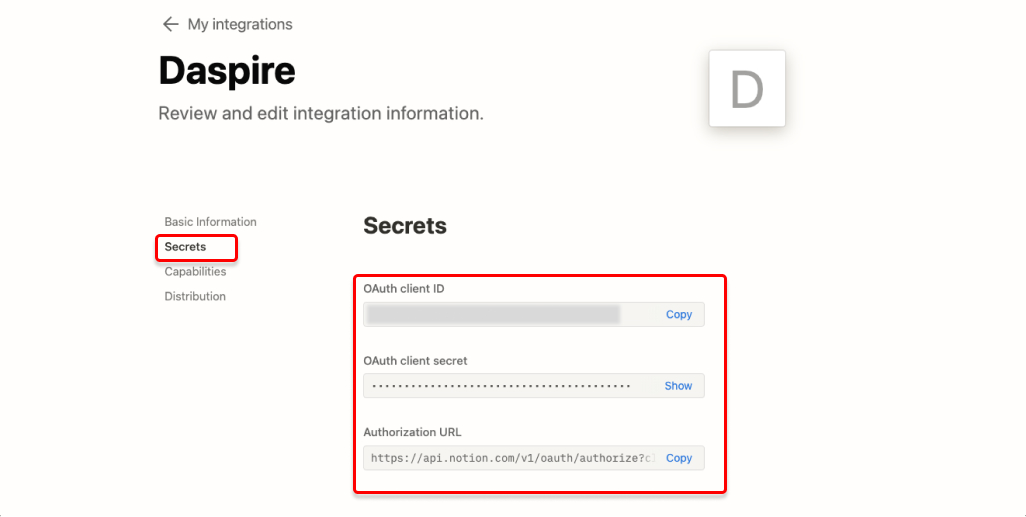
Once you click Submit after filling out all the required field, you will be directed to the Secrets tab. Copy your Client ID, Client Secret and Authorization URL.

You need to use your integration's Authorization URL to set the necessary page permissions and send a request to obtain your Access Token. A thorough explanation of the necessary steps is provided in the official Notion documentation.
You're ready to set up Notion in Daspire!
Using Access Token
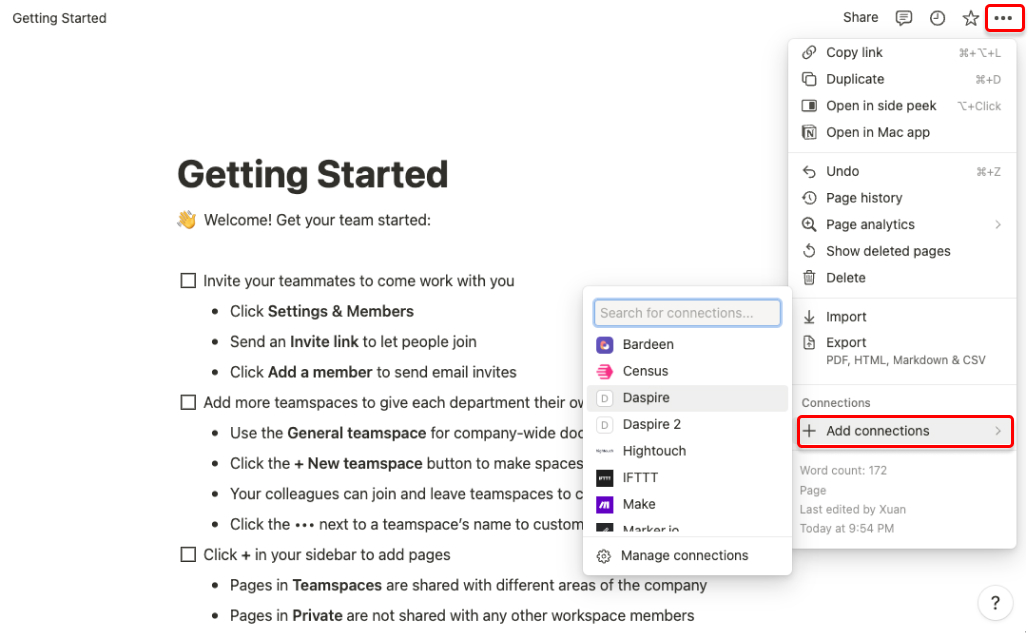
If you are authenticating via Access Token, you will need to manually share each page you want to sync with Daspire.
Navigate to the page(s) you want to sync with Daspire. Click the ••• menu at the top right of the page, scroll down to Add connections, and choose the integration you created in Step 1.

Once you have done that to all the pages you want to sync, go back to your integration, and copy the Access Token from the Secrets tab.
You're ready to set up Notion in Daspire!
Step 3: Set up Notion in Daspire
Select Notion from the Source list.
Enter a Source Name.
Copy and paste the Client ID, Client Secret and Access Token you acquired after setting up your public integration.
(Optional) You may optionally provide a Start Date in the format:
YYYY-MM-DDTHH:mm:ss.SSSZ. When using incremental syncs, only data generated after this date will be replicated. If left blank, Daspire will set the start date two years from the current date by default.Click Save & Test.
Output schema
This Source is capable of syncing the following core Streams:
Data type mapping
| Integration Type | Daspire Type |
|---|---|
string | string |
number | number |
array | array |
object | object |
Performance considerations
The integration is restricted by Notion request limits. The Notion integration should not run into Notion API limitations under normal usage.
Troubleshooting
Max number of tables that can be synced at a time is 6,000. We advise you to adjust your settings if it fails to fetch schema due to max number of tables reached.