NetSuite
This page contains the setup guide and reference information for NetSuite.
Daspire implements the SuiteTalk REST Web Services and uses REST API to fetch the customers data.
Prerequisites
- Oracle NetSuite account
- Allowed access to all Account permissions options
- Realm
- Consumer Key
- Consumer Secret
- Token ID
- Token Secret
- Language (the default language for your company)
Setup guide
Step 1: Setup NetSuite account and obtain required information
Step 1.1: Obtain Realm info
Login into your NetSuite account
Go to Setup » Company » Company Information
Copy your Account ID. Your account ID is your Realm. It will looks like 1234567 if you use regular account or 1234567_SB2 if it is a Sandbox
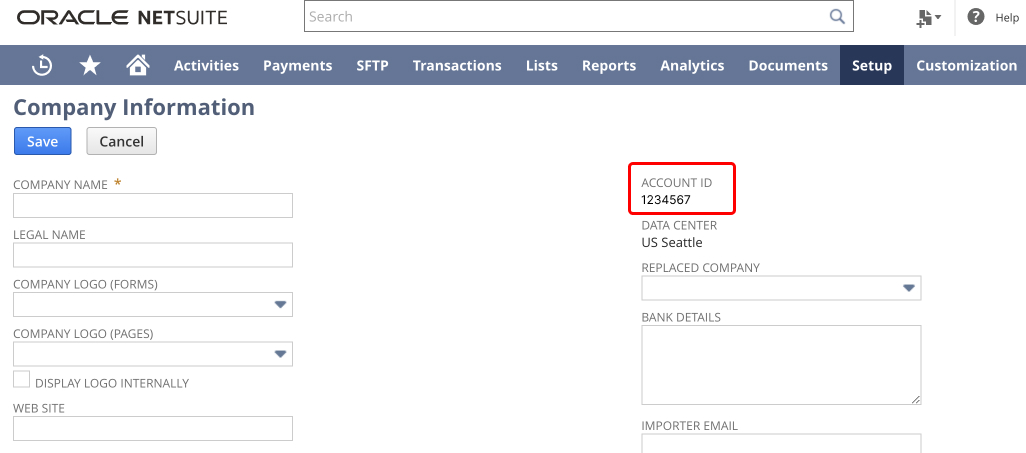
Step 1.2: Enable features
Go to Setup » Company » Enable Features
Click on SuiteCloud tab
Scroll down to Manage Authentication section
Enable checkbox TOKEN-BASED AUTHENTICATION
Save changes
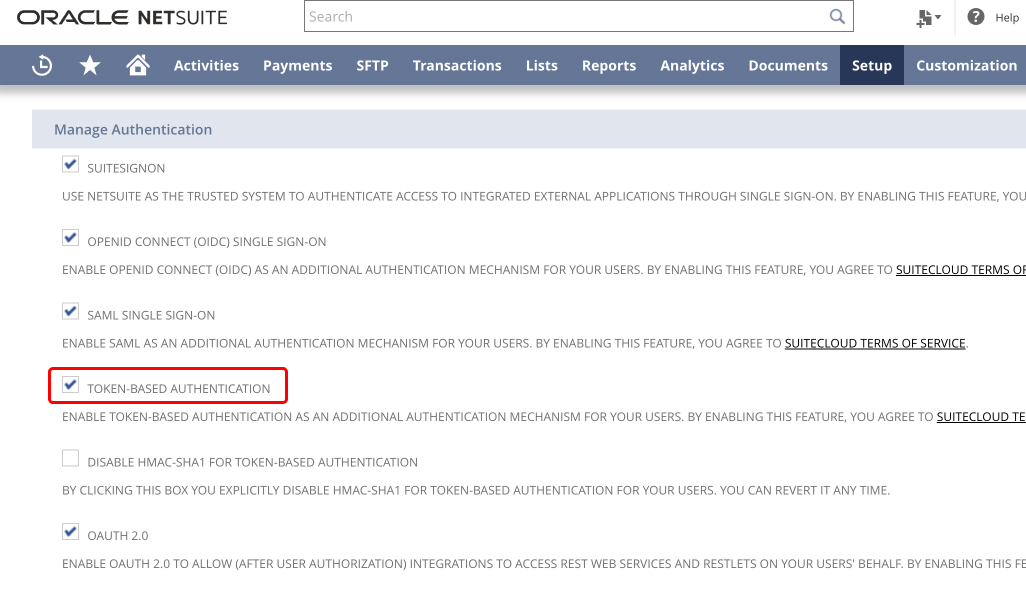
Step 1.3: Create Integration (obtain Consumer Key and Consumer Secret)
Go to Setup » Integration » Manage Integrations » New
Fill the Name field. It is a just description of integration
State will keep enabled
Set up your Concurrency limit, and make sure it's equal or less than concurrency limit
Enable checkbox Token-Based Authentication on Authentication section
Save changes
After that, Consumer Key and Consumer Secret will be showed once, copy them.
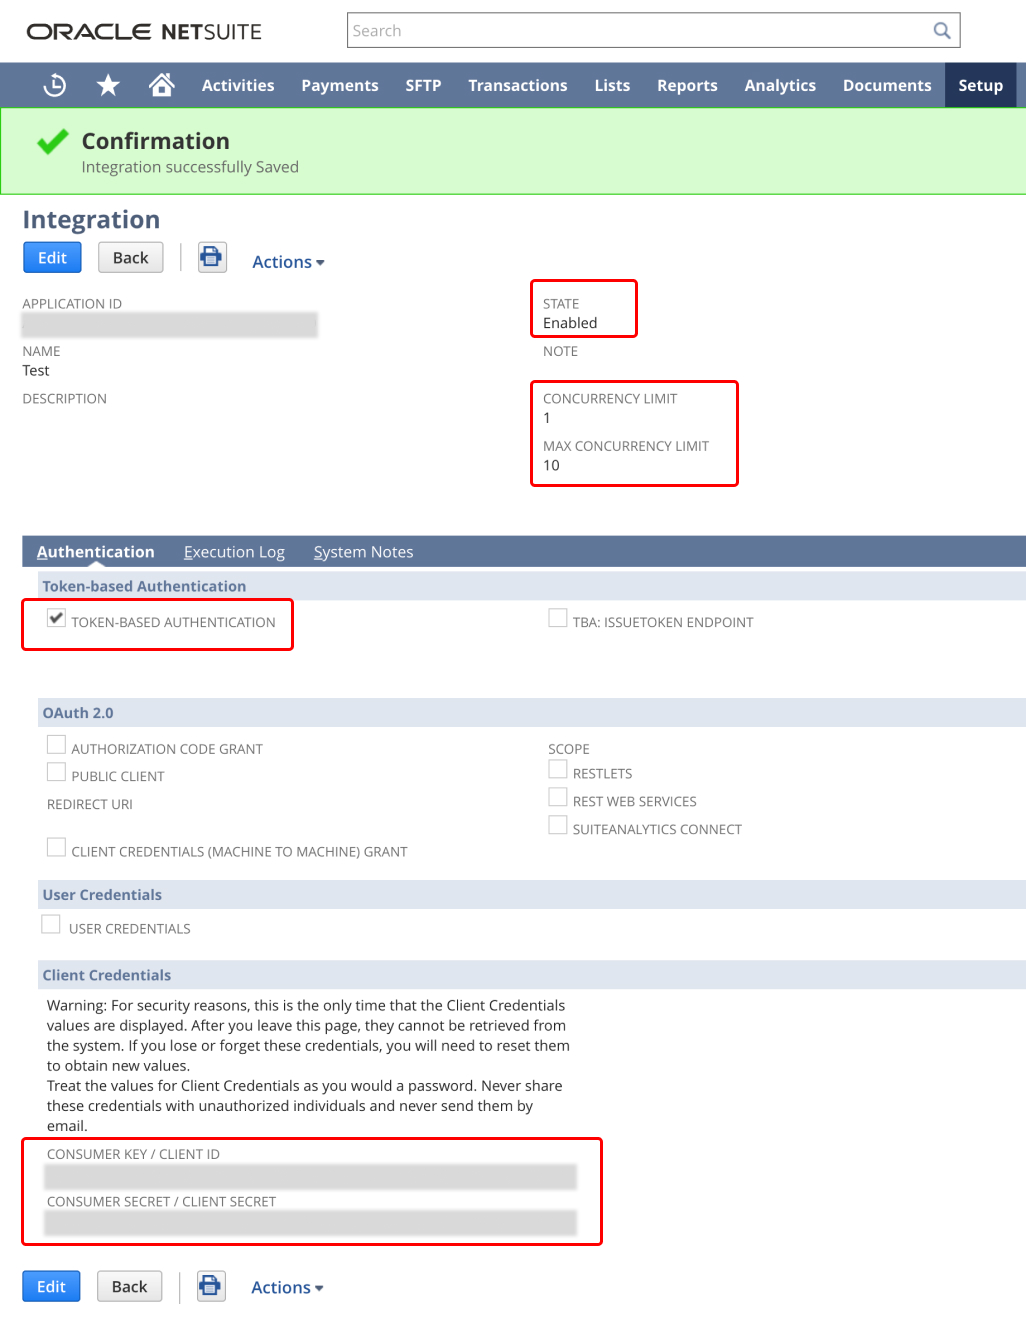
Step 1.4: Setup Role
Go to Setup » Users/Roles » Manage Roles » New
Fill the Name field.
Scroll down to Permissions tab.
You need to select manually each record on selection lists and give Full level access on next tabs: (Permissions, Reports, Lists, Setup, Custom Records). You strongly need to be careful and attentive on this point.
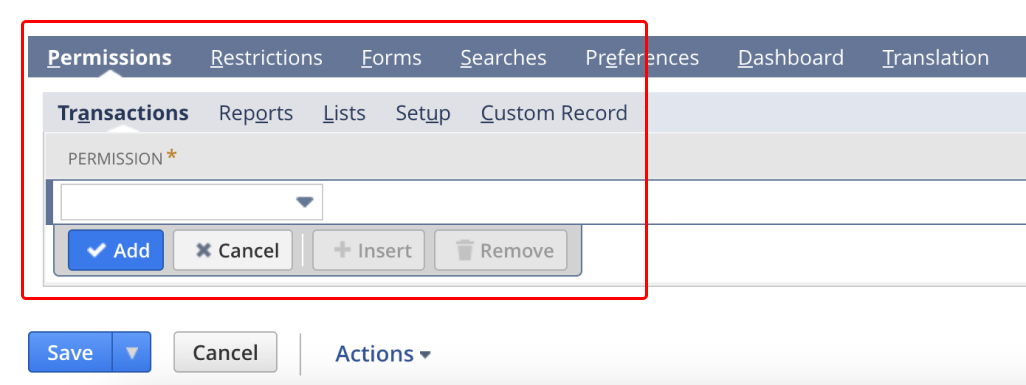
Step 1.5: Setup User
Go to Setup » Users/Roles » Manage Users
In column Name click on the user's name you want to give access
Then click on Edit button under the user's name
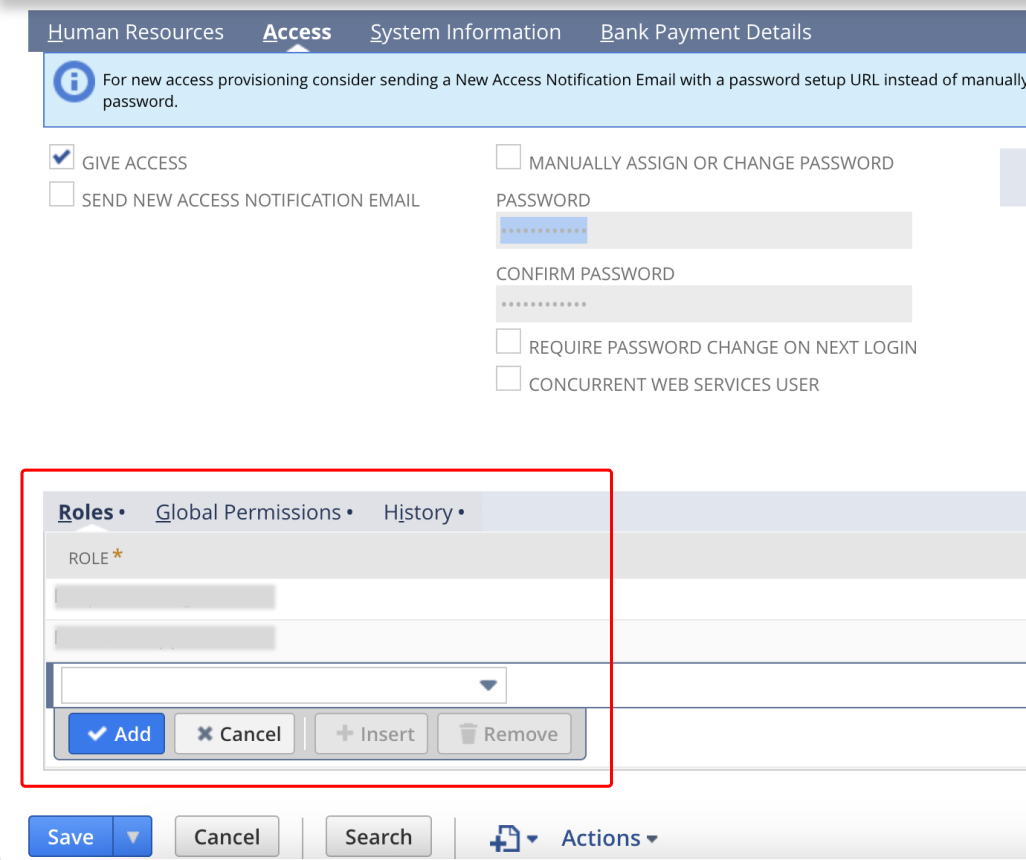
Scroll down to Access tab at the bottom
Select from dropdown list the role which you created in step 1.4
Save changes
Step 1.6: Create Access Token for role
Go to Setup » Users/Roles » Access Tokens » New
Select an Application Name
Under User select the user you assigned the Role in the step 1.4
Inside Role select the one you gave to the user in the step 1.5
Under Token Name you can give a descriptive name to the Token you are creating
Save changes
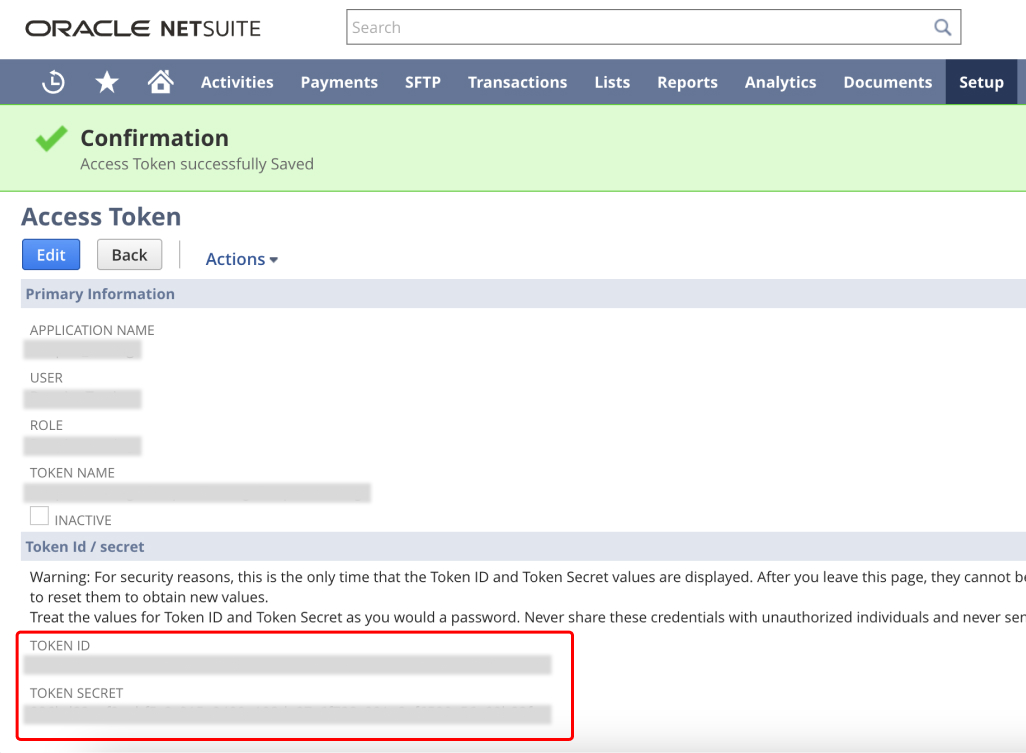
After that, Token ID and Token Secret will be showed once, copy them
Step 1.7: Obtain default language for your company
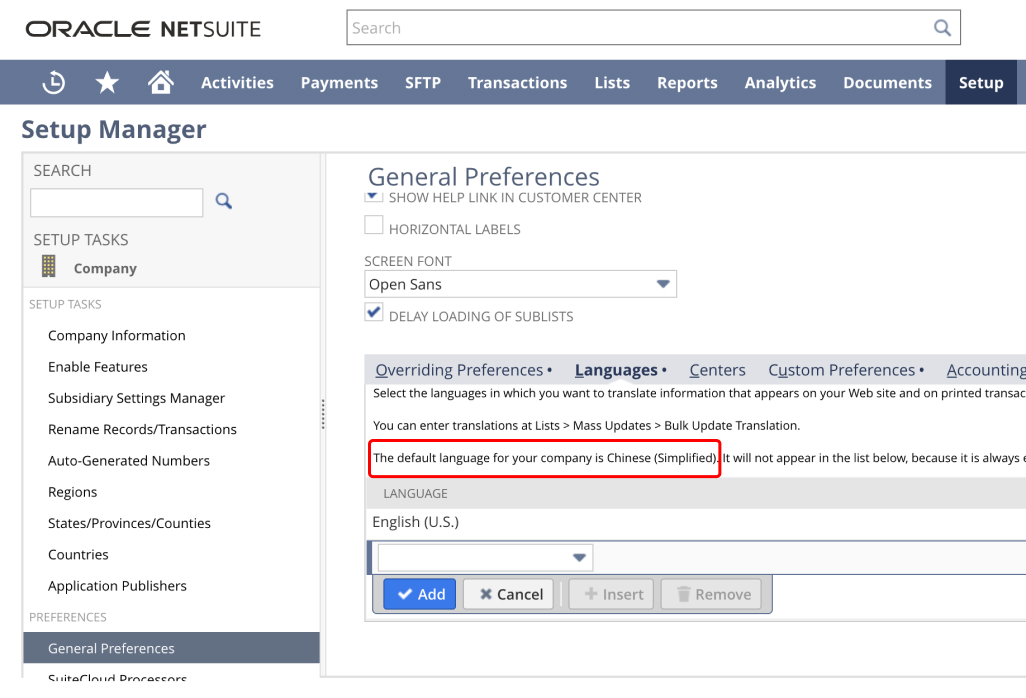
Go to Setup » Setup Manager » Company » General Preference
Click on Languages tab
You will find the default lanaguge for your company here
Step 1.8: Summary
You have obtained the following parameters:
- Realm (Account ID)
- Consumer Key
- Consumer Secret
- Token ID
- Token Secret
- Default language for your company
- Also you have properly Configured Account with Correct Permissions and Access Token for User and Role you've created early.
Step 2: Set up the source in Daspire
Go to Daspire dashboard.
In the left navigation bar, click Sources. In the top-right corner, click + new source.
On the source setup page, select NetSuite from the Source type dropdown and enter a name for this source.
Add Realm
Add Consumer Key
Add Consumer Secret
Add Token ID
Add Token Secret
Add Language
Add Object Types
Add Start Date
Click Save & Test
Supported sync modes
The NetSuite source connector supports the following sync modes:
- Full Refresh
- Incremental
Supported Streams
- Streams are generated based on ROLE and USER access to them as well as Account settings, make sure you're using Admin or any other custom ROLE granted to the Access Token, having the access to the NetSuite objects for data sync.
Performance considerations
The integration is restricted by Netsuite Concurrency Limit per Integration. Sync might stop or fail if Concurrency Limit is reached.
You can find your Concurrency Limit per Integration in Setup » Integration » Integration Goverance. Under Concurrency Usage you can view the account concurrency limit and the unallocated concurrency limit.
If sync fails due to concurrency limit, you can try resync to see if it works.
You can also contact NetSuite customer support to change your Concurrency Limits.
Troubleshooting
Max number of tables that can be synced at a time is 6,000. We advise you to adjust your settings if it fails to fetch schema due to max number of tables reached.