Zendesk Chat
This page contains the setup guide and reference information for Zendesk Chat.
Features
| Feature | Supported? |
|---|---|
| Full Refresh - Overwrite | Yes |
| Full Refresh - Append | Yes |
| Incremental - Append | Yes |
| Incremental - Deduped | Yes |
Prerequisites
- A Zendesk account with an Administrator role
- Zendesk Access Token
- Zendesk subdomain
Setup guide
Step 1: Create the OAuth API client
Follow these instructions or the below steps to Add API client. This process will produce the client id and client secret you will need to generate the access token needed to set up the source in Daspire.
Inside your Zendesk Chat account in the left navbar, click Settings, then click Account.
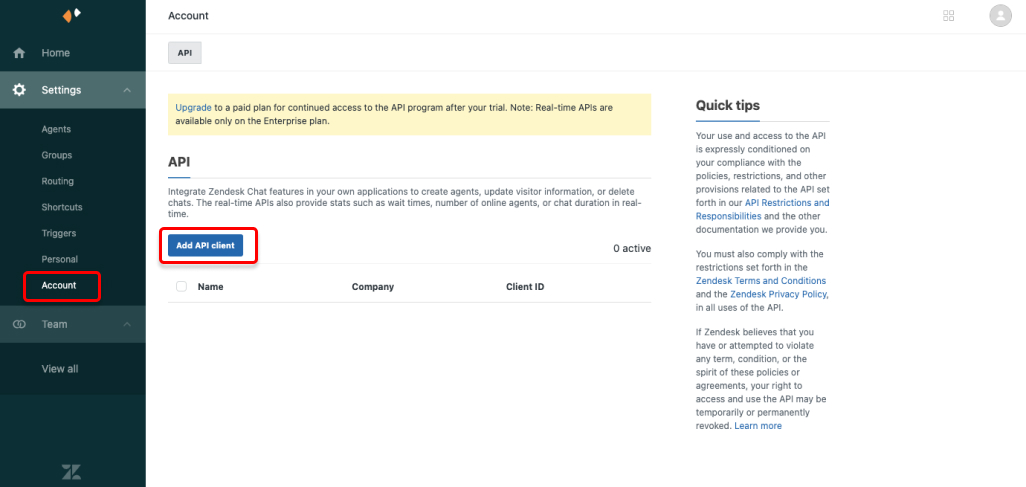
Click Add API client.
Enter a name for the client and company of your choosing, and for the Redirect URL. You can use
http://localhost:8080as the Redirect URL. Once done, click Create API client.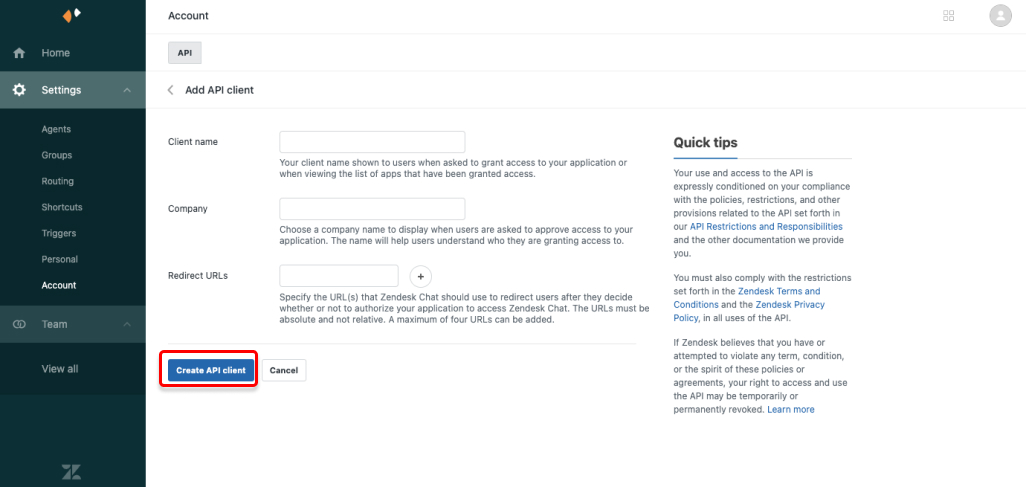
You will be shown a popup with the Client ID and Client secret.
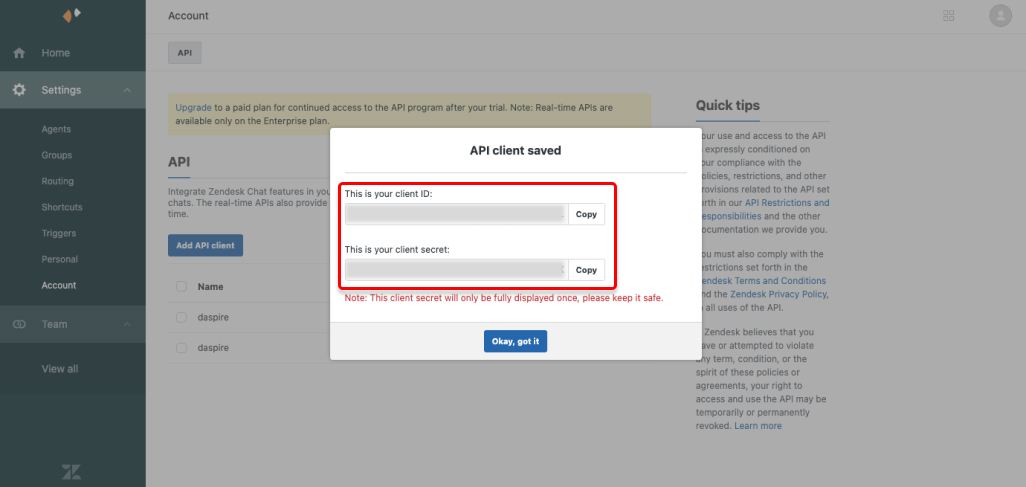
NOTE: The client secret is shown only once, so make a note of it for later use.
Step 2: Obtain the Access token
- Format the below URL with your own CLIENT_ID which you obtained in step 1 and your Zendesk SUBDOMAIN.
https://www.zopim.com/oauth2/authorizations/new?response_type=token&client_id=CLIENT_ID&scope=read%20write&subdomain=SUBDOMAIN
Paste it into a new browser tab, and press Enter.
The call will be made, possibly asking you to log in and select Allow to generate the token.
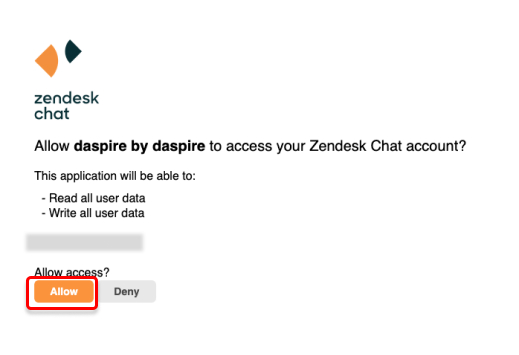
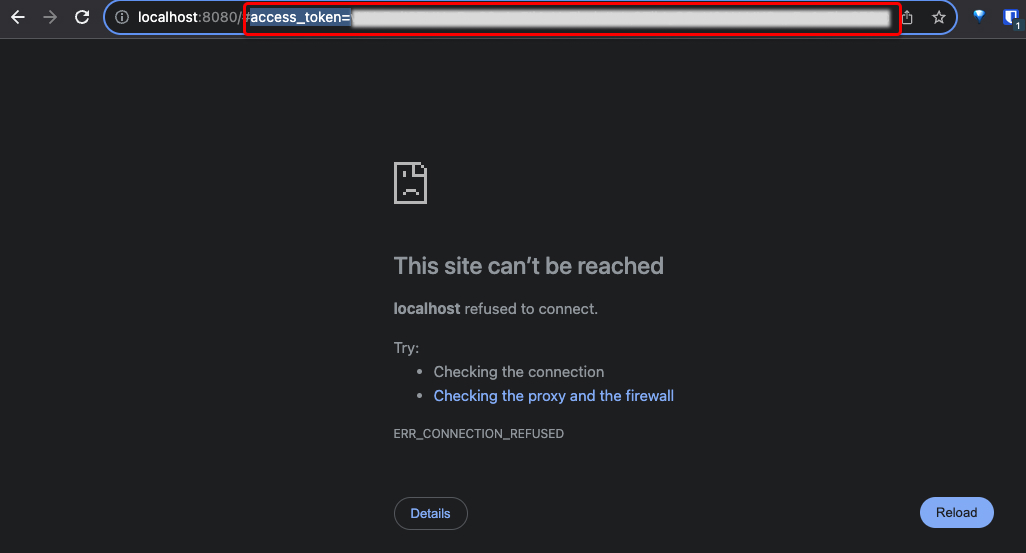
If the call succeeds, your browser's address field will contain your access_token. Copy it.
Step 3: Set up Zendesk Chat in Daspire
Select Zendesk Chat from the Source list.
Enter a Source Name.
To authenticate your account, select Access Token and enter the Access Token you generated in Step 2.
For Subdomain, enter your Zendesk subdomain. This is the subdomain found in your account URL. For example, if your account URL is
https://MY_SUBDOMAIN.zendesk.com/, thenMY_SUBDOMAINis your subdomain.(Optional) For Start Date, enter a UTC date and time programmatically in the format
YYYY-MM-DDTHH:mm:ssZ. The data added on and after this date will be replicated. If this field is left blank, Daspire will replicate the data for the last two years by default.Click Save & Test.
Output schema
This Source is capable of syncing the following core Streams:
- Account
- Agents (Incremental)
- Agent Timelines (Incremental)
- Chats
- Shortcuts
- Triggers
- Bans (Incremental)
- Departments
- Goals
- Skills
- Roles
- Routing Settings
Data type mapping
| Integration Type | Daspire Type |
|---|---|
string | string |
number | number |
array | array |
object | object |
Performance considerations
The integration is restricted by normal Zendesk requests limitation. The integration ideally should not run into Zendesk API limitations under normal usage.
Troubleshooting
Max number of tables that can be synced at a time is 6,000. We advise you to adjust your settings if it fails to fetch schema due to max number of tables reached.